

Reading the Map: Why Location Matters
Not all damp patches are created equal. A stain high on a gable wall points to something entirely different from a tide-mark running along the base of a ground-floor room. Before reaching for a bucket of paint or calling a contractor, take a moment to read what the location is actually telling you — it can save you time, money, and a misdiagnosis that just lets the problem worsen underneath a fresh coat of paint.
| High on external wall or ceiling | Likely roof, gutter, or flashing failure |
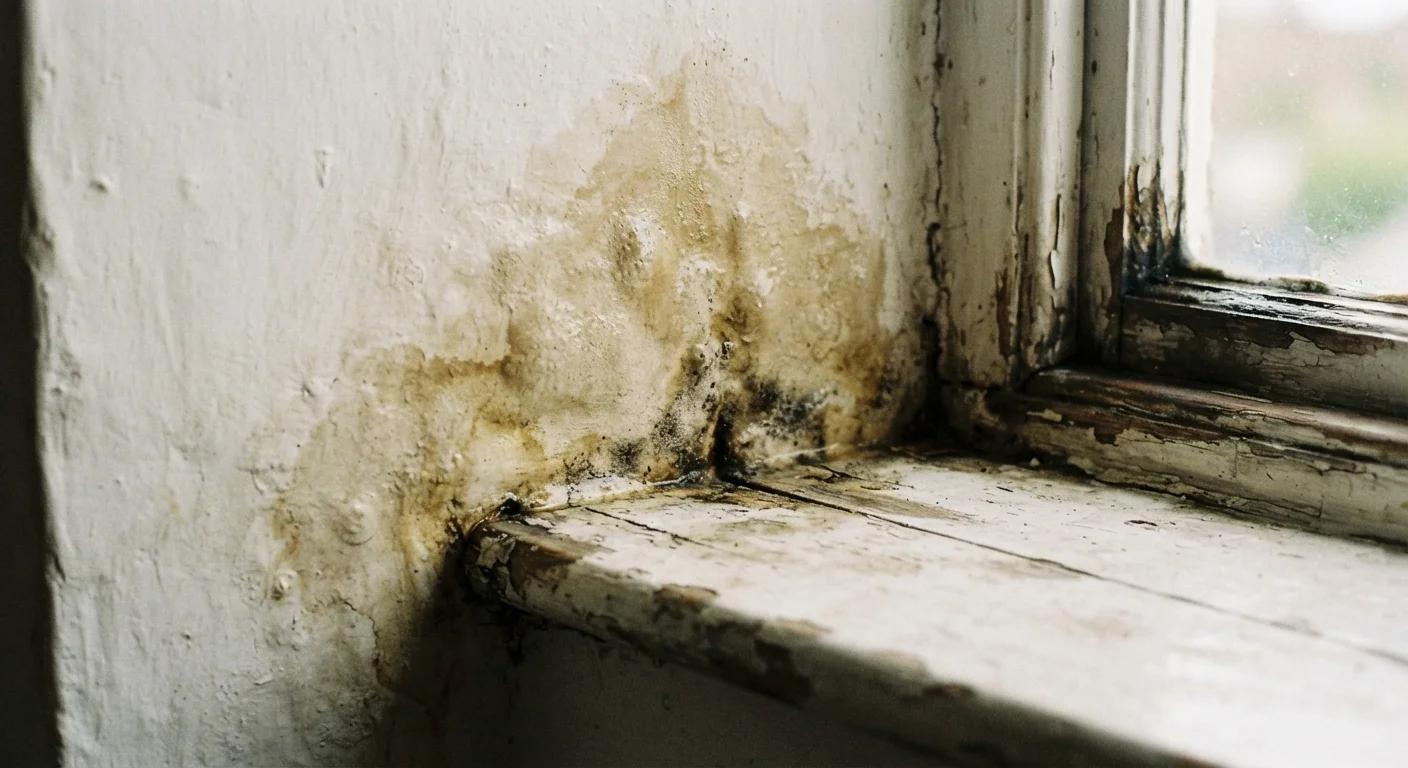
| Around windows or door frames | Likely penetrating damp — failed sealant or render |
| Horizontal band at base of wall | Likely rising damp — possible failed DPC |
| Corners or internal walls in cold weather | Likely condensation — ventilation issue |
| Bathroom-adjacent wall | Check grout and sealant in wet areas first |
| White powdery deposits on surface | Efflorescence — sign of moisture moving through the wall |
There are three primary sources of unwanted moisture in a home: water entering from outside (penetrating damp), water rising through the structure from the ground (rising damp), and water produced inside the home that condenses on cold surfaces (condensation). Each leaves clues in predictable locations. Use the pattern below as your first diagnostic step.
Damp Patterns and What They Signal
High on an External Wall or Ceiling
A patch that appears near the top of an external wall, on the ceiling directly below a flat roof, or in an upper corner usually points to a roof or flashing failure. Check gutters for blockages, inspect flashing around chimneys or skylights, and look for cracked or missing roof tiles. Water travels along rafters and joists before appearing on a ceiling, so the visible stain may be some distance from the actual entry point.
On an External Wall at Mid-Height — Often Around Windows or Doors
Patches radiating outward from window frames, door lintels, or where pipes penetrate the wall suggest penetrating damp caused by failed sealant, cracked render, or mortar erosion. Resealing gaps around frames can address minor ingress, but widespread staining warrants a closer look at the exterior render or brickwork pointing.
At the Base of Ground-Floor Walls
A horizontal damp tide-mark — typically no higher than 1 metre — running consistently along the base of a wall is the signature of rising damp. This occurs when a damp-proof course (DPC) has failed, is absent, or has been bridged by raised external ground levels or internal floor finishes. Rising damp is often accompanied by white salt deposits (efflorescence) on the plaster surface. Diagnosing and treating a failed DPC requires a specialist; this is not a DIY fix.
Patches That Appear in Cold Weather or in Corners and Behind Furniture
Patches that show up on internal walls (with no external face behind them), particularly in corners where two walls meet or ceilings meet walls, are more commonly condensation. Warm, moist indoor air contacts a cold surface and deposits moisture, which feeds mold growth. This is especially common in bathrooms, kitchens, and poorly ventilated bedrooms. Improving ventilation and heating is the first line of response — not re-plastering.
Mold Is a Symptom, Not the Root Problem
Black or green mold growth on walls is a result of persistent moisture, not its cause. Treating mold with surface sprays without addressing the underlying damp will allow it to return. Identify and fix the moisture source first, then remediate the mold. In cases of extensive mold growth, seek professional assessment — particularly in homes with occupants who have respiratory conditions.
Wet-room surfaces deserve particular attention: deteriorating grout or sealant in bathrooms can allow water to migrate behind tiles and into adjacent walls. If a bathroom-adjacent wall is damp, check the condition of grout and sealant lines before assuming a structural problem.
When to DIY and When to Call a Professional
Some moisture issues are genuinely within a homeowner's reach. Improving bathroom extractor fans, clearing blocked gutters, and re-caulking around window frames are all reasonable DIY tasks. However, the following situations warrant a qualified professional:
- Rising damp treatment — chemical DPC injection or membrane installation requires specialist assessment and workmanship.
- Structural roof repairs — working at height on a roof carries serious injury risk; licensed roofers carry appropriate insurance and equipment.
- Any damp that is accompanied by signs of wood rot — moisture that has reached structural timbers can compromise integrity faster than it appears. See our guide on identifying and catching wood rot early.
- Damp near electrical fittings — water and wiring is a safety hazard; do not proceed without isolating circuits and consulting a licensed electrician.
One often-overlooked step before repainting a damp-affected wall: resolve the moisture source first. Painting over a damp substrate traps moisture and leads to the very patchiness described in our article on why painted walls look patchy after two coats. Allow walls to dry fully — which may take several weeks — before applying any finish.
This article provides general home maintenance guidance only. Always consult a qualified professional for structural assessments, electrical concerns, or situations involving potential safety risks. Verify any local code or permit requirements with your local authority before undertaking repairs.
The content on this site is for informational purposes only and is not a substitute for professional advice. Always consult a qualified professional for guidance specific to your situation.