

What Most Tiling Guides Leave Out
Tiling a bathroom wall looks straightforward on paper: spread adhesive, press tiles, grout, done. In practice, the steps that make the difference between a job that lasts a decade and one that fails in the first winter are almost never in the box instructions. Surface condition, movement joints, adhesive selection, and grouting timing are where most DIY tile jobs go wrong — and where this guide focuses.
The preparatory steps that most homeowners skip are just as relevant here: poor sequencing and inadequate substrate preparation account for the majority of tile failures in bathrooms. The information below fills those gaps.
Waterproofing Behind Tiles Is Non-Negotiable
In shower enclosures and areas with direct water contact, bare plasterboard — even moisture-resistant board — is not a waterproof substrate on its own. A tanking membrane or waterproofing compound applied before tiling is essential. Skipping this step is one of the most common causes of hidden wall damage that only becomes apparent years later. If you're unsure whether your substrate is adequately protected, consult a qualified tiler or builder before proceeding.
Notched trowel
Combs adhesive onto the wall surface to create an even, ridged bed that helps tiles bond securely.
Tile cutter or angle grinder with diamond blade
Makes clean, accurate cuts around outlets, fixtures, and edges.
Spirit level and chalk line
Ensures your tile rows stay perfectly horizontal and vertical throughout the job.
Tile spacers
Maintains consistent grout joint width across the entire tiled surface.
Rubber grout float
Pushes grout into joints without scratching tile faces.
Grout sealer
Applied after grout cures to prevent moisture absorption and staining.
Waterproofing membrane or tanking compound
Applied to the substrate before tiling in wet areas to prevent water penetrating behind tiles.
Step-by-Step: Tiling Your Bathroom Wall
Before you begin, gather your tools and confirm your substrate is ready. Work methodically and resist the urge to rush any curing stage — adhesive and grout manufacturers specify those times for good reason.
What you will need
Assess and Prepare the Substrate
Tap the entire wall surface with your knuckle and listen for hollow sounds — these indicate loose plaster that must be repaired or removed. Fill any cracks, sand down high spots, and ensure the surface is clean, flat, and dust-free. In shower areas, apply a waterproofing tanking membrane according to the product manufacturer's instructions and allow it to cure fully before proceeding.
Plan Your Layout With a Dry Run
Measure the wall width and mark the center point. Using a batten (a straight piece of lumber) temporarily nailed horizontally at tile height, dry-lay your tiles along the wall without adhesive. This reveals where cuts will fall. Aim to position cut tiles symmetrically at both sides, and ensure no cut tile is less than half a tile wide — sliver cuts look poor and are difficult to achieve neatly.
Mix and Apply Tile Adhesive
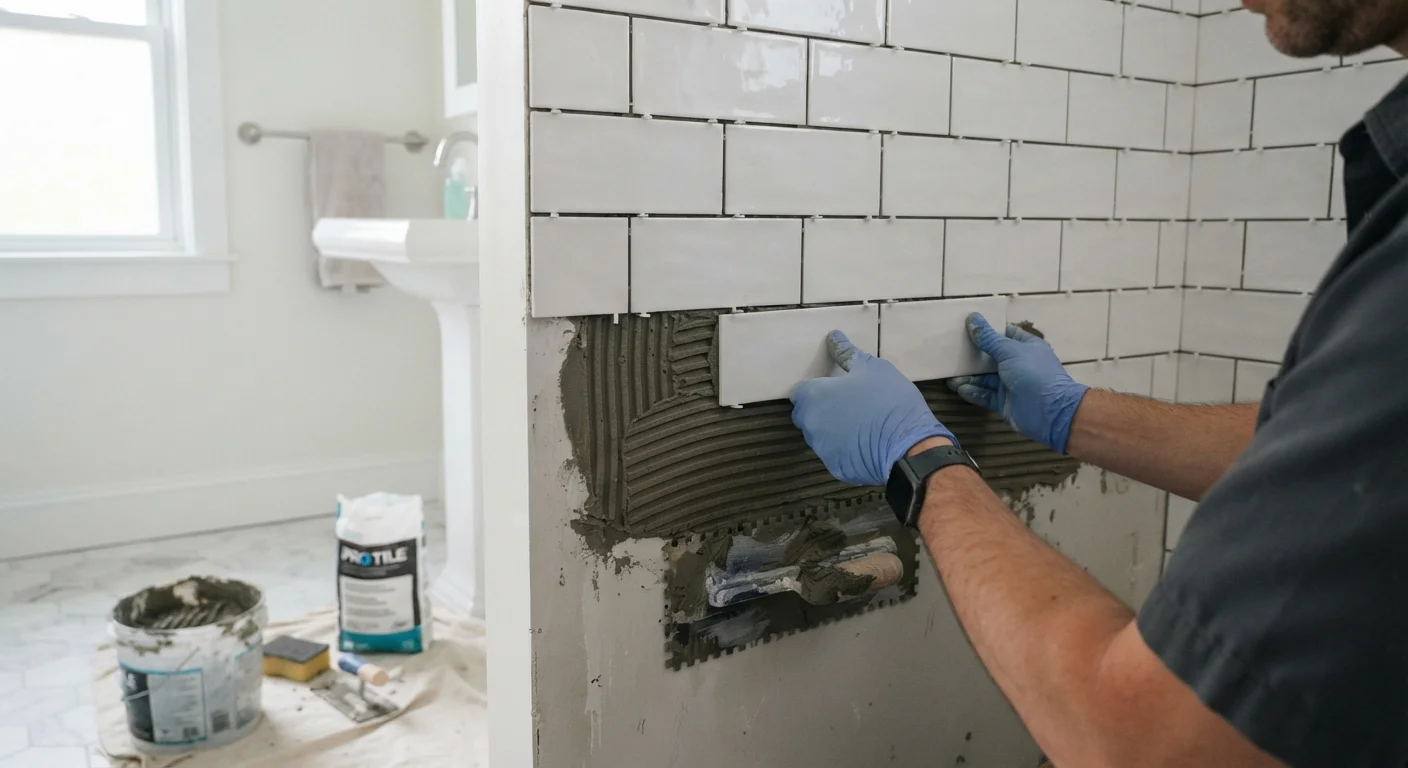
Choose a flexible, waterproof adhesive rated for wet wall applications. Mix to a smooth, lump-free consistency if using powder adhesive, or use ready-mixed product per the manufacturer's guidance. Apply to the wall using the flat edge of a notched trowel, then comb through with the notched edge at a consistent 45-degree angle. Work in manageable sections — roughly 1 square meter at a time — so the adhesive doesn't skin over before tiles are pressed in place.
Set the Tiles
Press each tile firmly onto the adhesive with a slight twisting motion, then give it a gentle tap with a rubber mallet to ensure full contact. Insert tile spacers at each corner as you go. Use your spirit level constantly — checking horizontal and vertical alignment after every two or three tiles prevents small errors from compounding across the wall. Remove any adhesive that squeezes into the joints immediately with a damp cloth.
Allow Full Adhesive Cure Before Grouting
This is one of the most frequently skipped steps. Grouting too early — before the adhesive has cured — can shift tiles and weaken the bond. Check the adhesive manufacturer's recommended cure time; for most products this is at least 24 hours, and longer in cold or humid conditions. Once cured, remove all tile spacers using a pointed tool.
Grout the Joints
Select a grout appropriate for your joint width — unsanded grout for joints under 3mm, sanded for wider joints. Mix or use as directed, then apply diagonally across the tile faces using a rubber grout float, pressing firmly into each joint. Work in sections and remove excess grout from tile faces with a damp sponge before it sets. Rinse the sponge frequently. Once the grout hazes over, polish the tiles with a dry cloth. For ongoing watertight maintenance, see our guide on keeping wet rooms watertight.
Seal the Grout
Allow grout to cure for the time specified on the packaging — typically 24 to 48 hours. Then apply a penetrating grout sealer using a small brush or applicator, working methodically along each joint. Wipe any sealer off tile faces immediately. Sealing prevents moisture and cleaning products from degrading the grout over time. Plan to reseal annually in high-use shower areas.
Start From the Middle, Not the Corner
Corners are rarely truly square, especially in older homes. Starting your layout from the center of the wall and working outward ensures the most visible area looks balanced and symmetrical. Cuts at the edges are far less noticeable than uneven tiles in the middle of the wall.
If you notice any existing damp issues on the wall before tiling, address them first. Our related article on reading damp patches on walls can help you identify whether there's an underlying problem that tiling over would only conceal. Tiling is also one of several maintenance tasks new homeowners commonly overlook until a more costly repair becomes necessary.
This article provides general DIY guidance for informational purposes. Always verify local building code requirements before undertaking bathroom renovation work, and consult a qualified tradesperson for tasks involving plumbing, electrical work, or structural changes.
The content on this site is for informational purposes only and is not a substitute for professional advice. Always consult a qualified professional for guidance specific to your situation.